Crack Open a Brand
This is the capstone. You invent a drink brand with a flavor name and an original mascot, design a flat can label, and wrap it onto a 3D can. Nothing new is taught today. You use shapes and the Pen (Sessions 1 to 3), swatches (Session 4), a stacked type treatment (Session 5), and 3D mapping (Session 6). Then you add a third artboard and export a square social crop. Original brand and character only. No real company names or logos.
Shortcuts are written Windows / Mac. Example: Ctrl+G / Cmd+G. On a Mac, Option is the key some Windows lists call Alt.
Today is studio time. Follow the order of the steps and the clock, and work at your own pace inside each step. Ask for help at any checkpoint.
What you turn in
- Midpoint (Step 5):
LastName_FlatLabel.jpg: a JPEG of your flat label art. - Final (Steps 7 and 8):
LastName_CanMockup.jpg(the can mockup, uploaded in Step 7) andLastName_Social.jpg(the square social crop, uploaded in Step 8), both JPEGs. Keep yourLastName_CrackOpen.aifile for yourself. Do not upload it.
Downloads
CrackOpen_StudentFiles.zip: the one file for today. Unzip it before Step 1.CrackOpen_Can_Starter.ai: inside the zip. The 3D can, already built, with two artboards: Can and Label.CrackOpen_Can_Flat.svg: inside the zip. A flat can, only if 3D fails on your computer.CrackOpen_Swatches.ase: inside the zip, in the Palette folder. Six colors to choose from.
What we build today
One document, three artboards: Can, Label, and Social. You design on Label, wrap onto Can, and build Social last.

The flat label
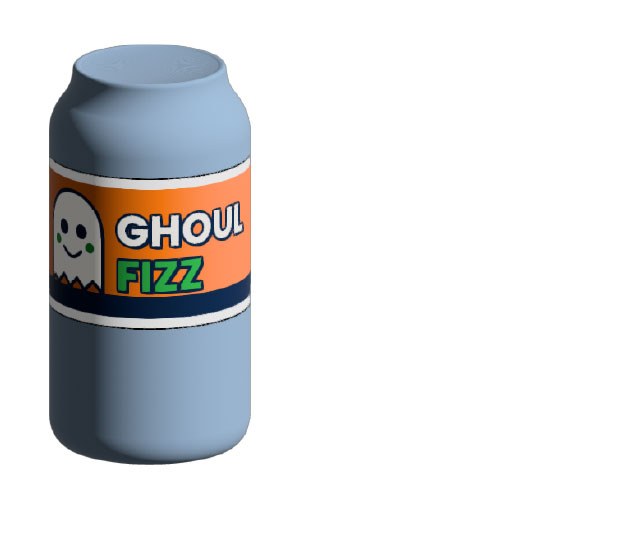
The can mockup
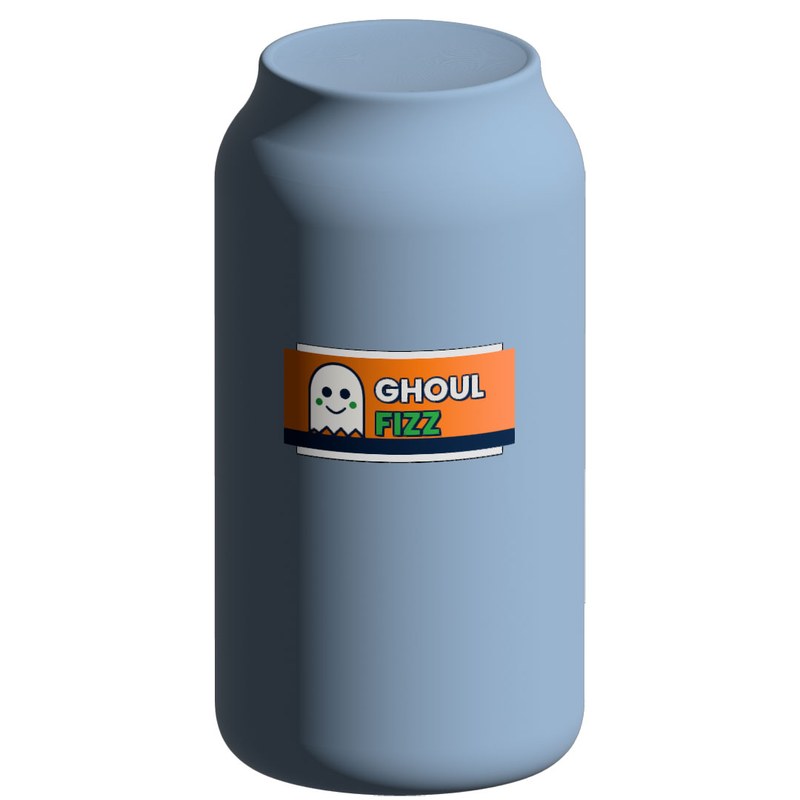
The social crop
What your files should look like
The invented brand here is Ghoul Fizz. The can and crop are real exports. Yours will have your own brand, colors, and mascot.
Flat label example
Can mockup example
Social crop example
The class palette
Pick three colors for your brand from these six (a fourth is fine for a highlight). Load them as swatches in Step 1. Color from the Swatches panel, not by typing hex codes on each object.
| Swatch | Name | Hex | Used on |
|---|---|---|---|
| Fizz Orange | #E8731C | A warm brand color | |
| Kelly Green | #2F9E44 | A fresh brand color | |
| Deep Navy | #1B365D | Outlines and shadows | |
| Warm White | #F6F4EF | A light ground or highlights | |
| Copper | #C86A42 | A second warm color | |
| Grape | #7A3FB0 | A bold accent |
Quick refresher: Photoshop to Illustrator
Everything today is a skill you have already used. Here is where each one came from.
| Photoshop | Illustrator |
|---|---|
| Shapes and Pathfinder (mascot) | Ellipse (L), Rectangle (M), Pen (P), and Pathfinder Unite. Sessions 1 to 3. |
| Global swatches (palette) | Swatches panel, Swatch Libraries menu at the bottom left, Other Library. Sessions 2 to 4. |
| Stacked type treatment (wordmark) | Appearance panel: Fill, Stroke, and an offset Fill. Session 5. |
| 3D wrap (mockup) | 3D and Materials: Graphics, Add as Single Graphic, click it onto the can, shrink with the circle widget. Session 6. |
| Export As JPEG with a Range (turn-ins) | File > Export > Export As, Use Artboards, Range. Sessions 1 to 6, plus Range today. |
| Photoshop: several artboards in one file | Illustrator keeps all three artboards in one file. Each one exports on its own. |
Class plan
| Start | Minutes | What | How |
|---|---|---|---|
| 0:00 | 4 | Opening: pick your brand, colors, and mascot | Demo and sketch |
| 0:04 | 5 | Step 1: Open the can file and load colors | Do along |
| 0:09 | 12 | Step 2: Build your mascot | Studio |
| 0:21 | 10 | Step 3: Build the wordmark | Studio |
| 0:31 | 5 | Step 4: Lay out the label | Studio |
| 0:36 | 3 | Step 5: Midpoint turn-in | Gate |
| 0:39 | 9 | Step 6: Wrap the label on the can | Do along |
| 0:48 | 4 | Step 7: Render and export the can | Turn-in |
| 0:52 | 6 | Step 8: Social crop and final export | Turn-in |
| 0:58 | Core ends. Midpoint and final turned in. | ||
| 0:58 | 8 | Step 9: Bonus, color the can to match your brand | Bonus, ahead students only |
| 1:06 | Bonus ends. Optional steps. | ||
Steps
Open the can file and load colors
about 5 min- Unzip
CrackOpen_StudentFiles.zip. Choose and openCrackOpen_Can_Starter.ai. You see a 3D can on an artboard named Can and an empty artboard named Label to its right. - Choose . Set the format to Adobe Illustrator (ai). Name the file
LastName_CrackOpen.ai, click Save, and click OK in the options box. Do this first so you never change the starter. - Open the Swatches panel with . Click the Swatch Libraries menu at the bottom left of the panel, choose Other Library at the bottom of the list, pick
CrackOpen_Swatches.asefrom the Palette folder, click Open, then click the small Add to Swatches button at the bottom of the new panel. Close the library panel. - Open and . Close any floating Color or Color Guide panels with their X.
- Look at the bottom left of the window. The small box that shows an artboard number lets you jump between artboards. Choose artboard 2 (Label) so the window zooms to the Label artboard. Press
Tabto hide all panels for a clear view andTabagain to bring them back.
LastName_CrackOpen.ai, the six swatches are in your Swatches panel, and the window shows the empty Label artboard.If not: If you see the can instead, choose artboard 2 at the bottom left. If the swatch library will not open, ask for the file again or type the hex codes from the palette table.
- Save As first. The starter stays clean for the next student.
- Close extra panels. They hide your work.
Build your mascot
about 12 min- Decide your mascot on paper first: a creature or object that fits your flavor (a ghost, a pumpkin, a bat, a candy corn, a can with a face). It must be your own design, not a character from a show, a game, or a real brand.
- On the Label artboard, build the body from simple shapes: the Ellipse tool (
L), the Rectangle tool (M), and the Pen tool (P). Hold Shift to keep a shape even. Keep the whole mascot on the left third of the artboard, about 300 pixels wide. - Select the shapes that make up the body and click Unite in the Pathfinder panel () so they become one shape.
- Add a face and one detail: two ellipses for eyes, a short stroke for a mouth (Pen tool, or a curve), and one extra, such as cheeks or a spike. Keep it to six shapes or fewer.
- Color it with your swatches. Give the body a stroke of Deep Navy at about
8pt with Round Join (). Use your other brand colors for the details. - Select the whole mascot, press Ctrl+G / Cmd+G to group it, and move it to the left third of the label.
If not: If shapes fall apart when you move them, they are not grouped. Select them all and press Ctrl+G / Cmd+G. If the mascot spills over the artboard edge, move it back inside. If the outline looks spiky, set the stroke corner to Round Join.
- Keep the mascot simple. A bold shape reads better on a can than detail.
- Keep everything inside the artboard.
Build the wordmark
about 10 min- Press
Tfor the Type tool. Click once on the right two thirds of the Label artboard (click, do not drag). Type your brand name in capital letters. To leave the text box, click the black arrow in the toolbar (the Selection tool). Do not press Esc and then type: the letters fire tool shortcuts. - With the text selected, open and choose a heavy display font (the Discover More tab in the font menu, or
Arial Blackif nothing loads). Set the size so the name fills the right two thirds of the label, about100to140pt. - Open the Appearance panel. Click Add New Fill and set it to a bright brand swatch (the top row). Click an empty spot in the panel to close the swatch pop-up. If a Stroke row is already in the list, click it; if not, click Add New Stroke. Set it to Deep Navy,
14pt, and Round Join (). Click Add New Fill again and set it to Deep Navy. Drag the rows so the order from top to bottom is: Fill (bright), Stroke (navy), Fill (navy), Characters. Grab a row by the empty space on its right, not by its name, and drop it above the first row. Repeat until the order is right. - Click the bottom navy Fill row. Click fx, choose , and set Move Horizontal
8px and Vertical8px. Click OK. This is your offset shadow. - Add a short flavor line under the name with the Type tool, for example
CHERRY BOO, in a smaller size (about48pt). Give it the Warm White or a brand color fill. Leave the text with the black arrow.
If not: If the letters look navy, the navy Fill is above the bright one: drag the bright Fill to the top. If the outline eats the letters, drag the Stroke below the top Fill. If the shadow did not move, the Transform effect landed on the wrong row: undo, click the bottom Fill row, add it again.
- Click, do not drag, with the Type tool.
- Click a row in the Appearance panel before you change its color.
Lay out the label
about 5 min- Press
Mfor the Rectangle tool. Click once on the Label artboard and type900for Width and360for Height. Click OK. In Properties set X to450and Y to180so it sits exactly on the artboard. - Set the rectangle's fill to one of your brand colors and its stroke to None. Press Ctrl+Shift+[ / Cmd+Shift+[ to send it to the back.
- Arrange the mascot on the left and the wordmark and flavor line on the right so nothing touches the edge. Leave a small margin all around.
- Check the whole label. If anything hangs over the edge of the artboard, move it back in. Press Ctrl+Shift+A / Cmd+Shift+A so nothing is selected.
If not: If the background covers the mascot, it is not at the back: select it and press Ctrl+Shift+[ / Cmd+Shift+[. If part of the art hangs over the artboard edge, move it inside. Art that overlaps the edge also shows up in the exports of the neighboring artboard.
- Everything must stay inside the Label artboard.
- Use your brand colors and Deep Navy for contrast.
Midpoint turn-in
about 3 minturn-in- Choose . Set the format to JPEG. Name the file
LastName_FlatLabel.jpg. Check Use Artboards, click Range, and type2in the Range box. Check the folder at the top of the dialog. Click Export. - In the JPEG Options box, set Quality to High and Color Model to RGB. Click OK.
- Upload
LastName_FlatLabel.jpgto Canvas under the midpoint assignment.
LastName_FlatLabel.jpg is 900 by 360 pixels and shows only your finished label.If not: If the file shows the can instead, the Range was 1. If it has extra art in it, something hangs over the Label artboard edge. If the file is somewhere you did not expect, the dialog opens in the last folder you used.
- Range 2 is the Label artboard.
- The dialog remembers its last folder and Range. Set them every time.
Wrap the label on the can
about 9 min- Make sure the window shows the Label artboard. Drag a selection box around all your label art, starting in the gray area outside the artboard. Nothing from the Can artboard should be selected. Press Ctrl+G / Cmd+G to group it.
- In the 3D and Materials panel, click the Materials tab, then the Graphics sub-tab. Click the plus button and choose Add as Single Graphic. A thumbnail of your label appears next to the placeholder.
- Press Alt+Ctrl+0 / Alt+Cmd+0 to fit all artboards in the window. Click the body of the can (the round part, not the lid area) with the black arrow.
- In the Graphics area, click your new thumbnail (not the placeholder). Your label wraps onto the can, much too large.
- A blue circle appears on the can with four small white squares on it. Drag one of those squares toward the center to shrink the label until it fits across the front of the can. Drag the label itself to move it up or down.
If not: If nothing changes when you click the thumbnail, the can is not selected: click the body of the can first. If the label is huge, drag a widget handle toward the center. If you resized the can instead of the label, undo, then drag a white square on the blue circle, not a corner handle of the selection box.
- Select the can body before clicking the thumbnail.
- Drag a widget handle toward the center. Dragging outward makes it bigger.
- The graphic is a snapshot. If you change the label, add it again.
Render and export the can
about 4 minturn-in- Select the can with the black arrow. In the 3D and Materials panel, click the Ray Tracing switch (the icon at the top right of the panel). Wait a few seconds until the image stops changing.
- Choose . Set the format to JPEG. Name the file
LastName_CanMockup.jpg. Check Use Artboards, click Range, and type1. Check the folder. Click Export, then OK in the JPEG Options box (High, RGB). - Upload
LastName_CanMockup.jpgto Canvas.
LastName_CanMockup.jpg shows your can with the label wrapped on it.If not: If the export is grainy, wait for Ray Tracing to finish, then export again. If the file shows your label art, the Range was 2. If the render is slow on your machine, skip Ray Tracing and export the real-time preview.
- Range 1 is the Can artboard.
- Wait for Ray Tracing to finish.
Social crop and final export
about 6 minturn-in- Press Ctrl+Shift+A / Cmd+Shift+A so nothing is selected. Press
Shift+Ofor the Artboard tool. In Properties, click the New Artboard button (the plus next to the Name box). - Set X to
2300first. Then set W to1080and press Tab and set H to1080. Name itSocialand click Exit at the top of Properties. - Press
V. Click the can on the Can artboard, then press Ctrl+C / Cmd+C and Ctrl+V / Cmd+V. A copy appears in the middle of the window. In Properties set W250and H980. - Press
Tabto hide the panels and Alt+Ctrl+0 / Alt+Cmd+0 to see all artboards. Drag the can copy onto the center of the Social artboard. If the bottom hangs over the edge, pressShift+Upuntil it fits. - Press
Tabto bring the panels back. Click the can copy and hover over the Ray Tracing icon at the top right of the 3D and Materials panel. If the tip reads Switch to Real-time preview, Ray Tracing is already on: leave it. Otherwise click the icon. - Choose . Format JPEG, name
LastName_Social.jpg, Use Artboards, Range3. Check the folder. Click Export and OK. UploadLastName_Social.jpgto Canvas (the can JPEG went up in Step 7). KeepLastName_CrackOpen.ai.
LastName_Social.jpg is a 1080 by 1080 JPEG with a tall can on a white square.If not: If the artboard landed on top of the Label artboard, you set the size before X: undo, and set X first. If art from another artboard appears in the square, it hangs over the Social edge: move it back. If the label looks tiny, that is normal on the tall crop.
- Nothing selected before you create the artboard. A selected object can move when an artboard changes.
- Set X first, then the size.
Bonus: color the can to match your brand
about 8 minbonus- Click the can body on the Can artboard with the black arrow.
- Double-click the Fill box at the bottom of the toolbar. The Color Picker opens. Type the hex code of one of your brand colors in the field next to the # sign, press Tab, and click OK. The can body changes color live and your label stays.
- Wait for Ray Tracing to settle. Export
LastName_CanMockup.jpgagain with Range1, and replace the old file when asked. - Upload the new
LastName_CanMockup.jpgto Canvas if your instructor allows resubmits.
If not: If the label disappeared, you may have clicked the label graphic. Undo and click the can body again. If the can looks dark, that is the lighting.
- Select the can body before double-clicking Fill.
Final checklist
- My brand name and mascot are original. No real company name or logo.
- My label uses three colors from the class palette.
- My label sits entirely inside the Label artboard.
- I exported
LastName_FlatLabel.jpgwith Range 2,LastName_CanMockup.jpgwith Range 1, andLastName_Social.jpgwith Range 3. - The Social JPEG is 1080 by 1080 pixels.
- I uploaded JPEGs, not the .ai.
Optional steps
Finished early? Do these in any order.
A second flavor on the social can
about 9 min- Select the label group on the Label artboard. Hold Option (Mac) or Alt (Windows) and drag it a little to make a copy, or press Ctrl+C / Cmd+C and Ctrl+F / Cmd+F.
- Use the Direct Selection tool (
A) to click the background rectangle inside the copy and give it a different brand color. Change the flavor line to a second flavor name with the Type tool. - Select the copy and use Add as Single Graphic in the 3D and Materials panel.
- Click the can copy on the Social artboard, then click the new thumbnail. Drag a white square on the blue circle to fit the label.
- Export
LastName_Social2.jpgas Range3. Delete the extra copy from the Label artboard first so it does not leak into the Label export.
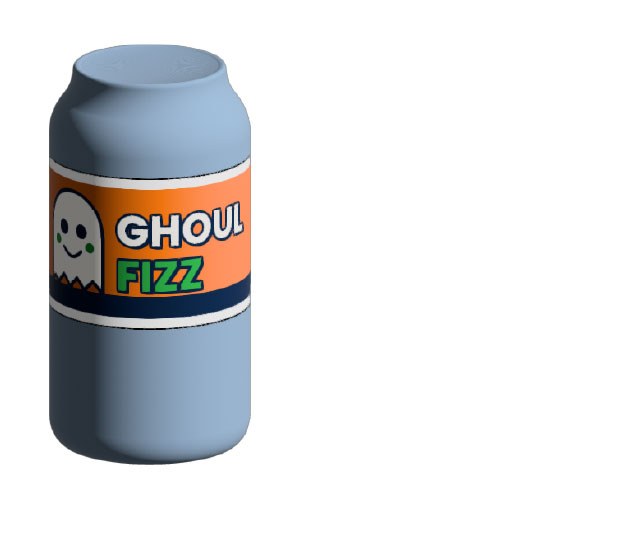
The reference images are real Illustrator exports of an invented brand, Ghoul Fizz. The label art was drawn by a script and placed as an SVG, so your own label will look different. The can and the crop are the real thing.
Troubleshooting
| Problem | Fix |
|---|---|
| I cannot find the Label artboard. | Use the artboard box at the bottom left of the window and choose 2, or press Alt+Cmd+0 (Mac) or Alt+Ctrl+0 (Windows) to see all artboards. |
| My mascot shapes fall apart when I move them. | They are not grouped. Select them all and press Ctrl+G or Cmd+G. |
| My text is a box and some words are missing. | You dragged with the Type tool. Undo, then click once. |
| The wordmark is all navy. | The navy Fill is above the bright one. Drag the bright Fill row to the top of the Appearance panel. |
| The shadow did not move. | The Transform effect landed on the wrong row. Click the bottom Fill row, then add the effect. |
| The label background covers my art. | Select the rectangle and press Ctrl+Shift+[ or Cmd+Shift+[ to send it to the back. |
| Add as Single Graphic does nothing. | Nothing is selected. Drag a box around the label art from the gray area and group it first. |
| Clicking the thumbnail does nothing. | The can is not selected. Click the body of the can, then click the thumbnail. |
| The label is huge on the can. | Drag one white square on the blue circle toward the center. |
| I squashed the can. | You dragged a corner handle of the selection box. Undo and drag a white square on the blue circle. |
| My new artboard moved my label. | A selected object or an overlapping artboard moved the art. Undo, deselect everything, set X first, then the size. |
| The export is the wrong artboard. | The Range box remembers its last value. Set Range to 1 (can), 2 (label), or 3 (social) every time. |
| 3D does not work on my computer. | Open CrackOpen_Can_Flat.svg, place your label small, choose Effect > Warp > Arc (Horizontal, Bend -20), then set the blend mode to Multiply in the Transparency panel. Tell your instructor. |
What this project was actually about
This is the first time you put your own brand on a product. A mascot, a wordmark, and a can mockup is a real small-brand deliverable. Everything you used today came from a session this term: shapes, the Pen, swatches, a stacked type treatment, and 3D mapping.
Tools used
- Open and Save As with a supplied 3D can
- Swatches: load a library
- Shape tools, Pen, Pathfinder Unite, Group
- Type tool, Character panel, Appearance panel stack, Transform effect
- Rectangle with typed size and Properties X and Y
- Add New Artboard (Properties), typed X, W, H, name
- 3D and Materials: Graphics, Add as Single Graphic, circle widget, Ray Tracing
- Copy and paste, scale a 3D object in Properties
- Export As JPEG with Use Artboards and a Range